Fixing Quiet AAC Stereo Audio on Android TV over HDMI ARC (The Xiaomi & Remote Setup Fix)
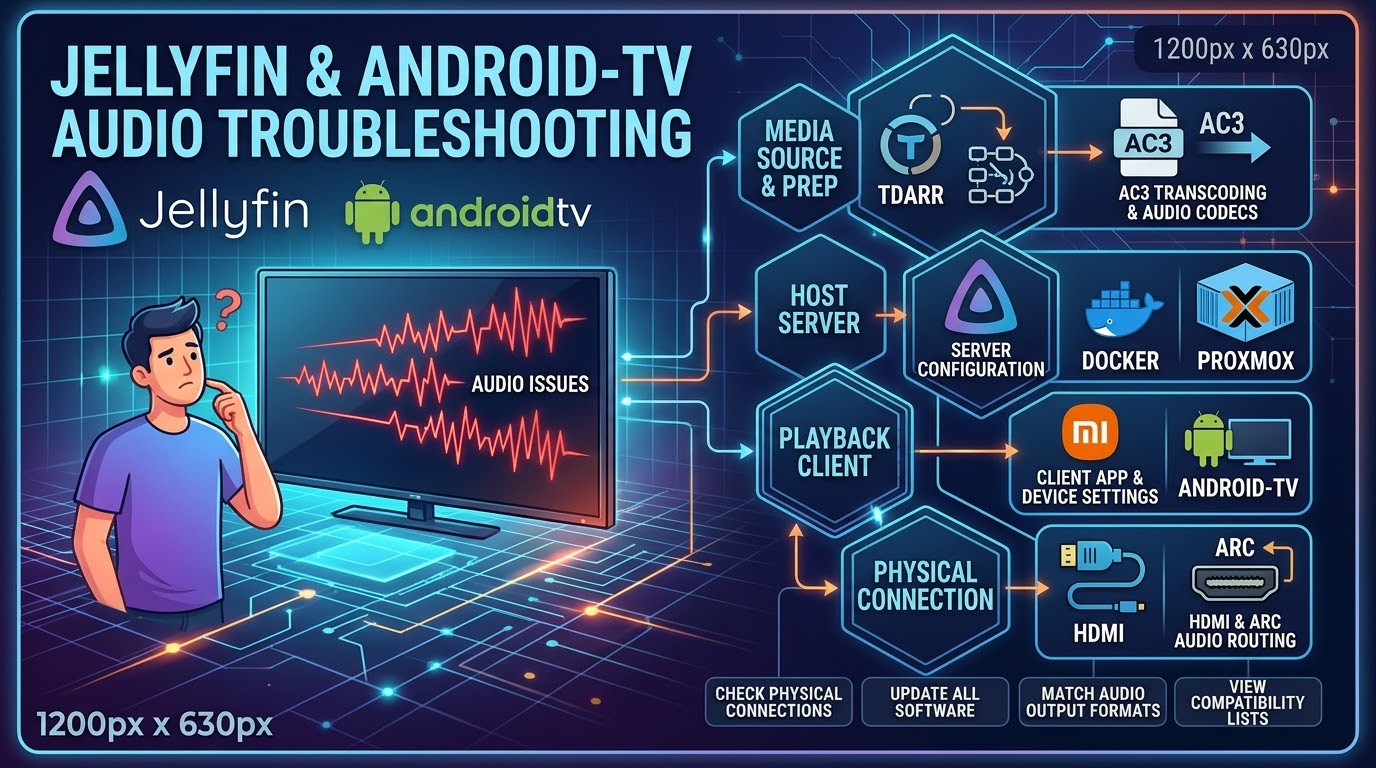
The Symptom
You’re streaming media on Jellyfin via an Android TV app (such as on a Xiaomi MiTV Box) connected to a soundbar or AV receiver over HDMI ARC.
- Opus and Dolby Digital Plus (DD+ / E-AC3): Sound crisp, balanced, and clear.
- 5.1 AAC: Sounds acceptable with multi-channel downmixing.
- 2.0 Stereo AAC: Barely audible even at 100% soundbar volume!
Path 1 & 2: The Red Herrings (Server Downmixing & Client Players)
Initially, I suspected standard downmixing bottlenecks or client-side player quirks:
- Increasing Downmix Audio Boost: Boosting multipliers to
2.0or3.0fixed 5.1 AAC downmixing, but distorted native 2.0 stereo AAC tracks. - Player Swapping (ExoPlayer vs. LibVLC): Swapping default players inside the Android TV client didn’t solve the attenuation issue because raw stereo AAC sent over HDMI ARC was still running through a constrained system pipeline.
The True Root Cause: Android TV “Remote Setup” Volume Limiting
The breakthrough discovery revealed that this issue is specific to Android TV hardware routing:
- The Remote Setup Trap: When Remote Setup (controlling TV/Soundbar volume via your Xiaomi remote) is enabled, the remote buttons bypass the Xiaomi Box’s internal software pre-amp and target the downstream display instead.
- The Locked Baseline: Consequently, the Xiaomi Box’s true internal master volume was locked down at a low default level (
10out of15), outputting an anemic, throttled line-level signal over HDMI ARC for plain PCM stereo tracks.
The Definitive Fix
To permanently fix the low stereo volume without installing third-party apps or altering media files:
- Disable Remote Setup: Go to your Android TV settings and temporarily disable Remote Setup so your remote controls the TV Box’s internal volume directly.
- Raise Internal Volume: Access the Xiaomi TV Box system volume and bump it up from
10to max (15) to provide the necessary software pre-amp boost. - Re-Enable Remote Setup: Turn Remote Setup back on and restart your TV Box. This locks the high-output gain baseline in place while restoring your remote’s capability to control your sound system normally.
Automating Storage Fixes with Tdarr (Alternative / Multi-Library Layer)
If you manage a large media library and want to ensure files play loudly across all clients without relying on device-specific volume tweaks, you can automate conversions at the storage layer using Tdarr.
1. Docker Compose Stack Alignment
1
2
3
4
5
6
7
8
9
10
11
12
13
14
15
16
17
18
19
20
21
22
23
24
25
26
27
28
29
30
31
32
33
34
35
36
37
38
39
40
41
42
43
44
45
46
47
48
49
50
51
52
53
54
55
56
57
58
59
60
61
62
63
64
65
66
67
68
69
70
71
72
73
74
75
76
77
78
79
80
81
82
83
84
85
86
87
88
89
90
91
92
93
94
95
96
97
98
99
100
101
102
103
104
105
106
107
108
109
110
111
112
113
114
115
116
117
118
119
120
121
122
123
124
125
126
127
128
129
130
131
132
133
134
135
136
137
138
139
140
141
142
143
144
145
146
147
148
149
150
151
152
153
154
155
156
157
158
159
160
161
162
163
164
165
166
167
services:

  # ─────────────────────────────────────────────
  # Tdarr Server  (database + API + Web UI)
  # ─────────────────────────────────────────────
  tdarr:
    container_name: tdarr
    image: ghcr.io/haveagitgat/tdarr:latest
    restart: unless-stopped
    network_mode: bridge
    ports:
      - "8265:8265"   # Web UI
      - "8266:8266"   # Server / Node communication

    healthcheck:
      test: ["CMD", "curl", "-fs", "http://localhost:8265/api/v2/status"]
      interval: 10s
      timeout: 5s
      retries: 10
      start_period: 20s

    environment:
      - TZ=${TZ}
      - PUID=${PUID}
      - PGID=${PGID}
      - UMASK=002

      # Server networking — 0.0.0.0 listens on all interfaces inside the container.
      # The node (below) connects via 127.0.0.1 because it shares the network
      # namespace of this container (network_mode: service:tdarr).
      - serverIP=0.0.0.0
      - serverPort=8266
      - webUIPort=8265

      # Run an internal node inside this container as well (convenient for
      # single-host setups). Set to false if you only want the external node.
      - internalNode=false
      - inContainer=true
      - ffmpegVersion=7

      # Auth & API
      - auth=true
      - apiKey=${TDARR_API_KEY}
      - openBrowser=false   # headless server — no browser to open
      - maxLogSizeMB=10
      - cronPluginUpdate=

      # GPU passthrough env vars (safe to leave even without GPU hardware;
      # Docker ignores them when no GPU runtime is configured).
      - NVIDIA_DRIVER_CAPABILITIES=all
      - NVIDIA_VISIBLE_DEVICES=all

    volumes:
      # Tdarr persistent state
      - ./server:/app/server
      - ./configs:/app/configs
      - ./logs:/app/logs

      # ── Media library (mirrors Jellyfin volume mounts exactly) ──────────
      # Main media library — read-write so Tdarr can write processed files
      # back in-place (or to a sub-directory like /media/converted).
      - type: bind
        source: /mnt/media
        target: /media


      # ── Transcode scratch space ──────────────────────────────────────────
      # MUST be a bind mount to a real host path shared by BOTH containers.
      # tmpfs cannot be shared — each container gets its own isolated RAM disk,
      # causing ENOENT when the server validates files written by the node.
      - type: bind
        source: /tmp/tdarr-transcode
        target: /temp

    # ── Hardware acceleration ─────────────────────────────────────────────
    # Intel iGPU / VAAPI / QSV — uncomment if /dev/dri exists on host.
    # devices:
    #   - /dev/dri:/dev/dri

    # NVIDIA GPU — uncomment and ensure nvidia-container-toolkit is installed.
    # deploy:
    #   resources:
    #     reservations:
    #       devices:
    #         - driver: nvidia
    #           count: all
    #           capabilities: [gpu]

  # ─────────────────────────────────────────────
  # Tdarr Node  (the actual FFmpeg worker)
  # ─────────────────────────────────────────────
  tdarr-node:
    container_name: tdarr-node
    image: ghcr.io/haveagitgat/tdarr_node:latest
    restart: unless-stopped

    # Shares tdarr's network namespace — node connects to server via localhost.
    network_mode: service:tdarr
    depends_on:
      tdarr:
        condition: service_healthy

    environment:
      - TZ=${TZ}
      - PUID=${PUID}
      - PGID=${PGID}
      - UMASK=002

      - nodeName=${NODE_NAME}
      # Because this node shares the server's network namespace, use 127.0.0.1.
      - serverIP=127.0.0.1
      - serverPort=8266
      - inContainer=true
      - ffmpegVersion=7
      - nodeType=mapped

      # Worker counts — tune to your CPU core count.
      # Rule of thumb: (CPU cores / 2) for transcode, 1 for health check.
      - transcodecpuWorkers=2
      - transcodegpuWorkers=0   # set to 1 when GPU is available
      - healthcheckcpuWorkers=1
      - healthcheckgpuWorkers=0

      - priority=-1             # run at lower priority than OS foreground tasks
      - pollInterval=2000       # ms between job polls
      - startPaused=false
      - maxLogSizeMB=10
      - cronPluginUpdate=
      - apiKey=${TDARR_API_KEY}

      - NVIDIA_DRIVER_CAPABILITIES=all
      - NVIDIA_VISIBLE_DEVICES=all

    volumes:
      # Node needs configs & logs
      - ./configs:/app/configs
      - ./logs:/app/logs

      # ── Media mounts MUST be identical to the server's mounts ───────────
      # Tdarr uses the same absolute paths in job metadata; mismatches
      # between server and node paths cause "file not found" errors.
      - type: bind
        source: /mnt/media
        target: /media

      # Shared temp — MUST match server's bind mount exactly (same host path).
      - type: bind
        source: /tmp/tdarr-transcode
        target: /temp

      # Alternative SSD temp:
      # - type: bind
      #   source: /tmp/tdarr-transcode
      #   target: /temp

    # ── Hardware acceleration (mirror server block) ───────────────────────
    # devices:
    #   - /dev/dri:/dev/dri

    # deploy:
    #   resources:
    #     reservations:
    #       devices:
    #         - driver: nvidia
    #           count: all
    #           capabilities: [gpu]
1a. Sample ENV file
1
2
3
4
5
6
7
8
9
10
11
12
13
14
15
# Tdarr Environment Variables
# Match these to your system user. Run `id` on the host to get values.
# Set PUID/PGID to 0:0 to match, OR create a dedicated media user (recommended).
PUID=0
PGID=0

# Timezone (match Jellyfin host)
TZ=UTC

# Tdarr API Key — set a strong random string here (used by internal node)
# Generate with: openssl rand -hex 32
TDARR_API_KEY=your_api_key_from_tdarr_web_ui

# Node name for the internal node (shown in UI)
NODE_NAME=InternalNode
2. Tdarr Flow Configuration (AC3 Conversion)
Using the classic plugin runner node (Tdarr_Plugin_a9hd_FFMPEG_Transcode_Specific_Audio_Stream_Codecs), you can target aac input streams and transcode them cleanly to ac3 (Dolby Digital Plus) while copying video tracks (-c:v copy).
1
2
3
4
5
6
7
8
9
10
11
12
13
14
15
16
17
18
19
20
21
22
23
24
25
26
27
28
29
30
31
32
33
34
35
36
37
38
39
40
41
42
43
44
45
46
47
48
49
50
51
52
53
54
55
{
  "_id": "jUAXKmsw_",
  "name": "Library Audio Transcode AC3 Flow",
  "description": "Transcodes quiet AAC streams to AC3 and preserves video.",
  "flowPlugins": [
    {
      "name": "Input File",
      "sourceRepo": "Community",
      "pluginName": "inputFile",
      "version": "1.0.0",
      "fpEnabled": true,
      "id": "7jgXVq0nr",
      "position": { "x": 600, "y": 108 }
    },
    {
      "name": "Run Classic Transcode Plugin",
      "sourceRepo": "Community",
      "pluginName": "runClassicTranscodePlugin",
      "version": "2.0.0",
      "id": "4E-aTNSe_",
      "position": { "x": 600, "y": 168 },
      "fpEnabled": true,
      "inputsDB": {
        "pluginSourceId": "Community:Tdarr_Plugin_a9hd_FFMPEG_Transcode_Specific_Audio_Stream_Codecs",
        "codec": "ac3",
        "codecs_to_transcode": "aac"
      }
    },
    {
      "name": "Replace Original File",
      "sourceRepo": "Community",
      "pluginName": "replaceOriginalFile",
      "version": "1.0.0",
      "fpEnabled": true,
      "id": "jiZxqk6Mn",
      "position": { "x": 600, "y": 336 }
    }
  ],
  "flowEdges": [
    {
      "source": "7jgXVq0nr",
      "sourceHandle": "1",
      "target": "4E-aTNSe_",
      "targetHandle": null,
      "id": "c_cQsdD51"
    },
    {
      "source": "4E-aTNSe_",
      "sourceHandle": "1",
      "target": "jiZxqk6Mn",
      "targetHandle": null,
      "id": "_bKNHET1g"
    }
  ]
}
Conclusion
By unlocking the Xiaomi TV Box’s internal master volume ceiling via the Remote Setup workaround, stereo PCM tracks finally receive the proper gain boost required to match your surround and web streams over HDMI ARC. Pair this with a robust Tdarr media pipeline, and your self-hosted setup will remain completely bulletproof!